Affordable Desk Risers for Ergonomic Relief on a Budget

Photo by Faizur Rehman on Unsplash
Affordable Desk Risers for Ergonomic Relief on a Budget
If your monitor sits too low and your neck aches by midday, a desk riser is one of the cheapest and fastest fixes available. A simple monitor riser elevates your screen to eye level, reducing strain on your neck and shoulders. The best part: quality options exist in the budget tier, so you don’t need to spend premium dollars to fix your posture problem.
What Is a Desk Riser and Why It Matters
A desk riser (or monitor riser) is a platform that sits on top of your desk and lifts your monitor, laptop, or keyboard to a more ergonomic height. Most people work with screens too low, forcing them to look down and forward—a posture that tightens the neck, shoulders, and upper back over time.
The ergonomic sweet spot is simple: your eye level should align with the top third of your monitor when you’re sitting upright with your arms at 90 degrees. A riser gets you there without replacing your entire desk.
Budget-friendly risers start at the most basic level—a solid platform—and scale up to models with storage shelves, adjustable heights, or built-in cable management. For most people, the basic platform is all you need.
Types of Budget Desk Risers
Fixed-Height Risers
These are one-piece platforms with no adjustment. You get a single height, usually between 3 and 6 inches. They’re the cheapest option and work well if your desk and chair combination already puts you close to the right ergonomic zone.
Pros: Minimal cost, no moving parts to break, stable. Cons: No flexibility if you switch monitors or change your setup.
Risers with Storage
Many budget models include a shelf or compartment underneath the riser. This adds storage for keyboard, mouse, documents, or desk clutter while keeping your monitor elevated. It’s a practical two-for-one.
Pros: Extra desk real estate, modest cost premium over plain risers. Cons: Takes up more depth on your desk, less suitable for tight spaces.
Adjustable Tilting Risers
Some budget options allow you to tilt the platform slightly, letting you angle your monitor up or down a few degrees. This adds flexibility without the complexity of full height adjustment.
Pros: Fine-tuning for different viewing angles and monitor sizes. Cons: Slightly higher cost than fixed models, more moving parts.
Key Features to Check on a Budget Riser
Weight capacity: Make sure it can safely hold your monitor. Most budget risers handle up to 25–50 pounds, which covers most single monitors. Check the spec sheet before buying.
Material: Plastic, wood, or metal. Plastic is cheapest and lightweight. Wood or metal feels sturdier and lasts longer. For budget picks, plastic is fine if the base is wide and weighted.
Stability: A wobbly riser defeats the purpose. Look for a wide footprint and non-slip feet. Avoid anything with a narrow base or tippy design.
Depth: How much desk space does it eat? Measure your desk depth and check the riser’s footprint. Storage-included models are deeper; plain platforms are shallower.
Cable management: Some risers have channels or clips for routing cables neatly. Nice to have, not essential.
Top Budget Desk Riser Picks
Our top pick: 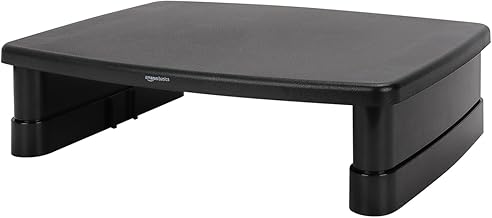
Runner-up: 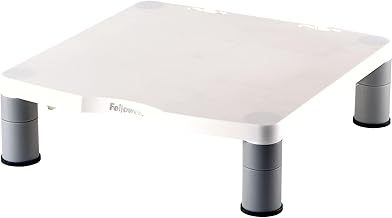
Budget pick: 
Desk Risers vs. Monitor Arms: When to Choose Which
A desk riser is a static platform. A monitor arm is articulated—it lets you move your monitor up, down, left, right, and rotate it. Monitor arms cost more but offer flexibility. Desk risers are cheaper and simpler.
Choose a riser if: You want a one-time fix at the lowest cost, you’re in a rental and can’t drill, or your desk and chair are already close to ergonomic.
Choose an arm if: You switch between multiple monitors, adjust your setup frequently, or need to free up desk space below the monitor. See Best Monitor Arms Under $100 for budget-friendly arm options.
Combining a Riser with Other Ergonomic Upgrades
A desk riser is just one piece of the puzzle. To build a truly ergonomic setup on a budget, pair it with:
- An ergonomic chair: Proper lumbar support and seat height matter as much as monitor height. Check out Affordable Ergonomic Office Chairs Under $200 for solid budget picks.
- A keyboard and mouse at the right height: Your keyboard should sit at elbow height when your arms are at 90 degrees. A riser sometimes pushes your keyboard too high, so you may need a separate keyboard tray or riser. See Best Budget Ergonomic Keyboards Under $80 for affordable input devices.
- An anti-fatigue mat if you stand: If you use a standing desk converter, an anti-fatigue mat reduces foot and leg strain. Check Best Anti-Fatigue Mats for Home Office Under $100 for budget options.
- A wrist rest pad: If your keyboard sits higher now, a wrist rest keeps your wrists neutral. Affordable Wrist Rest Pads for Keyboard and Mouse has budget picks.
For a complete budget setup, see Budget Home Office Ergonomics Setup Under $500.
DIY vs. Buying: Is a Riser Worth It?
Some people stack books or use a cardboard box to prop up their monitor. This works in a pinch, but it’s unstable, looks unprofessional, and wobbles when you touch the desk. A proper riser costs less than a lunch out and lasts years.
The ROI is simple: if a riser eliminates even one day of neck pain per month, it’s paid for itself in comfort and productivity.
Installation and Setup Tips
Most budget risers arrive fully assembled or need five minutes of setup. Here’s the typical process:
- Clear your desk of the monitor and any items below it.
- Place the riser in the center of your desk, leaving room on both sides for your keyboard and mouse.
- Slide the monitor onto the riser, centered and stable. Make sure it’s not overhanging the edge.
- Route cables behind the riser or through any cable channels if available.
- Adjust your chair height so your eyes line up with the top third of the monitor and your elbows are at 90 degrees.
That’s it. No tools, no drilling.
FAQ
Q: Will a desk riser help my neck pain? A: A riser helps if your neck pain is caused by looking down at a low monitor. If the pain comes from your chair, posture, or tension elsewhere, a riser alone won’t fix it. Combine it with an ergonomic chair and proper posture for best results.
Q: How high should a desk riser be? A: Most people need 4–6 inches of lift. The exact height depends on your desk, chair, and monitor size. Aim for your eyes to align with the top third of the screen when sitting upright.
Q: Can I put a riser on a standing desk? A: Yes, but be careful. Standing desks are already higher, so a riser might push your monitor too high when standing. Test the height before committing. Alternatively, use a standing desk converter instead. See Standing Desk Converter for Small Spaces Under $150 for budget converters.
Q: Do I need a riser if I use a monitor arm? A: No. A monitor arm does the job of a riser (and more) by itself. You’d use one or the other, not both.
Q: Will a riser work with a laptop? A: Yes, but only if your laptop is stable on the riser. Most risers work best with a separate external monitor and keyboard. If you’re using a laptop screen directly, the riser lifts the whole laptop, which can make typing uncomfortable unless you add an external keyboard.
Summary
A budget desk riser is one of the fastest, cheapest ergonomic fixes you can buy. For the price of a meal, you get a platform that lifts your monitor to eye level, reducing neck strain and improving posture. The best budget models—like the
Pair your riser with an ergonomic chair, proper keyboard height, and good posture habits for a complete setup. If you work at a desk eight hours a day, the small investment in a riser pays dividends in comfort and long-term health.